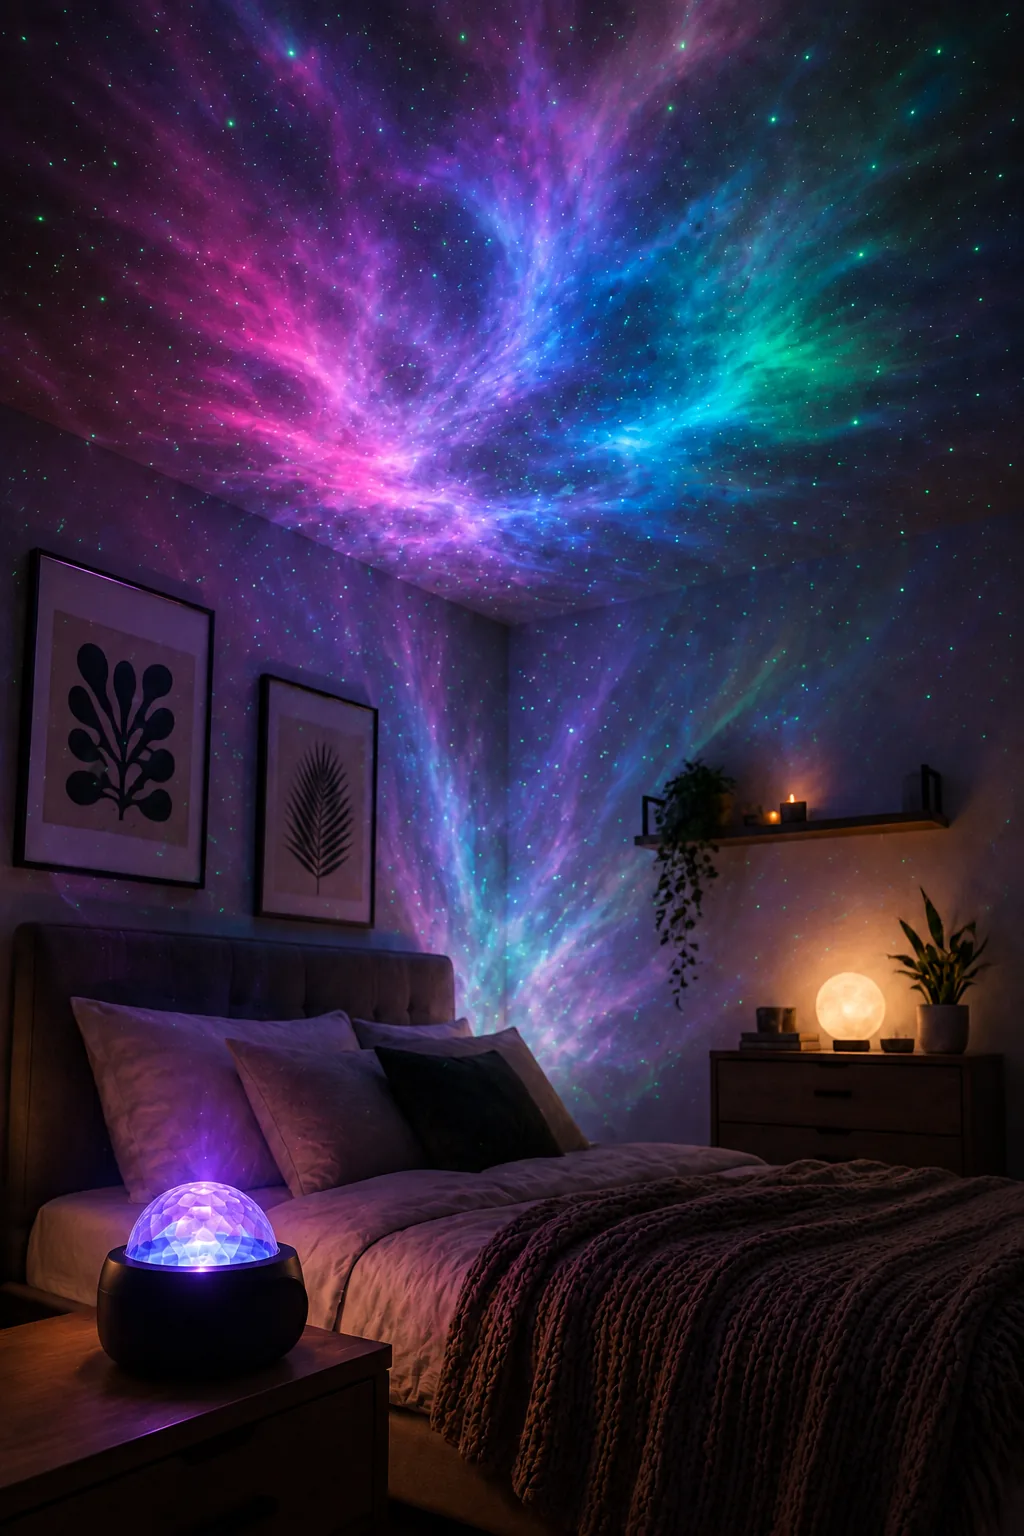
Star projector setup: on the floor, off-centre, and slower than the default
The stars are sharp on the ceiling, the coloured clouds from the box are a faint smudge, and the whole field turns like a fairground ride. All three are setup problems. The unit is usually fine.
Key takeaways
- Coverage width = 2 × distance × tan(half the beam angle). A 120° unit on the floor under a 2.5 m ceiling covers about 8.6 m.
- To brighten the nebula layer, raise the unit. On a 1 m shelf the field is half as wide and about four times brighter.
- Put it a third of the way into the room, tilted across the ceiling, and never under a ceiling fan.
- Run rotation at the slowest step or static, with a 30–60 minute timer. The default speed is the setting we change on almost every unit.
- Laser units must carry Class 1 or Class 2. Never aim one at eyes, mirrors or a window.
Why the stars show and the clouds do not
A star projector puts two separate pictures on the ceiling at once, and they fail in different ways.
| Layer | How it is made | Survives | Lost when |
|---|---|---|---|
| Star layer | A narrow beam, usually a low-power laser, through a diffraction grating | Long throws, textured ceilings, a little spill light | Almost never, unless the optics are damaged |
| Nebula layer | RGB LEDs behind a patterned film or moulded optic | A dark room and a pale matt ceiling | Any spill light, a dark or textured ceiling, too long a throw |
"The stars work but I cannot see the coloured clouds" is the most common complaint about these products, and the right-hand column is the answer. The nebula layer is the fragile one, and most of what follows is about keeping it visible. How the two layers are built, and the three types on sale, are in star lights: how a galaxy projector works.
How much ceiling will it cover?
Coverage is trigonometry from the beam angle and the distance to the surface:
Coverage width = 2 × distance × tan(beam angle ÷ 2)
For a wide unit with roughly a 120° spread, sitting on the floor of a room with a 2.5 m ceiling, that is 2 × 2.5 × 1.73 ≈ 8.6 m across — wider than most bedrooms, so the field runs down the walls as well, which generally looks good.
Put the same unit on a 1 m high shelf and the distance to the ceiling drops to 1.5 m, giving about 5.2 m of coverage. Half the height, roughly half the field — and because the same light now covers about a quarter of the area, it is around four times brighter. That trade is the whole placement decision.
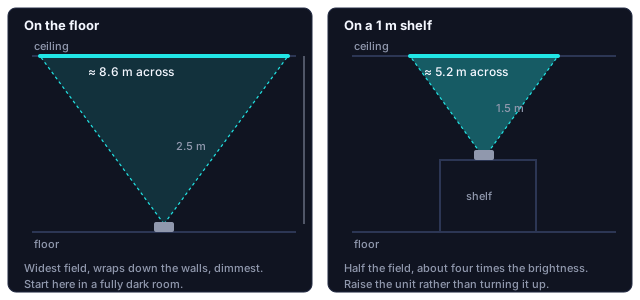
Boxes rarely print a beam angle. They print a coverage area instead, usually 10 to 20 m², and a 20 m² circle is about 5 m across — so a unit quoted at 20 m² from 2.5 m is closer to a 90° spread than 120°. The table gives both:
| Distance to ceiling | Width, 90° unit | Width, 120° unit | Brightness vs floor position |
|---|---|---|---|
| 1.5 m (1 m shelf) | 3.0 m | 5.2 m | about 2.8× |
| 2.0 m (low table) | 4.0 m | 6.9 m | about 1.6× |
| 2.5 m (floor) | 5.0 m | 8.6 m | 1× |
| 3.0 m (floor, tall room) | 6.0 m | 10.4 m | about 0.7× |
| Position | Field | Brightness | Best when |
|---|---|---|---|
| On the floor | Widest, wraps onto walls | Dimmest | Dark room, whole-room immersion is the goal |
| On a shelf or dresser, 1 m up | Moderate, mostly ceiling | Noticeably brighter | Rooms that are not perfectly dark, or a pale but not white ceiling |
| High shelf close to the ceiling | Small and intense | Brightest | Almost never — the field is too small to read as a sky |
Start on the floor in a fully dark room. If the nebula layer is too faint there, raise the unit rather than turning it up.
Where in the room to put it
- Off-centre beats centre. A unit in the middle of the floor throws a symmetrical field with an obvious centre point, and the eye finds the centre immediately. Placed a third of the way into the room, the field is asymmetric and reads more like sky.
- Aim across the room, not straight up. Tilting so the field crosses the ceiling and continues down the far wall is far more convincing than a disc directly overhead.
- Not under a ceiling fan. Rotating blades chop the beam and produce a hard flicker that is genuinely unpleasant. If the room has a fan, place the projector so its field reaches the ceiling beside the fan rather than through it.
- Check the sightline from the bed or sofa. The aperture is bright. If you can see directly into it from where you lie, it will be the brightest thing in your field of view and you will end up turning it away.
How fast should it rotate?
This is the setting we would change on almost every unit shipped, including our own.
Real sky does not visibly move. Anything faster than a drift becomes a moving pattern on a ceiling, and once your eye classifies it that way, the illusion is gone. In a bedroom it is worse: continuous visible motion in the dark is much harder to ignore than a static light of the same brightness. If the projector is there to help someone settle, motion works against that.
Set it as slow as the unit allows. If the slowest setting is still obviously moving, run it static and change the colour occasionally instead. A static star field with a slowly shifting nebula colour looks better than a fast-rotating one, and it is also easier on the motor.
Use the timer. Two reasons. The motor and the laser have a service life measured in running hours, so a unit left on all night every night wears out several times faster than one running for an hour. And a light that switches itself off is far more likely to still be in use in six months than one that has to be remembered. Thirty to sixty minutes is the setting that survives.
Getting the nebula layer to show
The star layer is hard to lose. The nebula layer is not. Ranked by how much difference it makes:
- Total darkness matters most. Not "lights off with the landing light on" — any spill light raises the ceiling brightness and the nebula disappears into it. Street light through thin curtains is enough to lose it.
- Pale matt ceiling second. White emulsion is ideal. A dark or strongly coloured ceiling loses the wash entirely while keeping the stars.
- Texture third. Artex, heavy stipple and exposed beams break the wash up. Stars still work — points do not care about surface texture nearly as much.
- Height last. Higher ceilings are dimmer but larger. It is the least important of the four.
Laser safety, which is not optional
Look for the laser class on the base or the box before anything else. A product sold for use at home should carry Class 1 or Class 2 under IEC 60825-1 (in the United States, the FDA's 21 CFR 1040). No class stated, no purchase. The other ratings to check are in the safety marks table.
- Never look directly into the aperture, at any distance.
- Do not aim it at people, at eye level, or at anything reflective that could direct the beam to eye level — mirrors, glazed picture frames, television screens.
- Do not aim it out of a window. In many countries directing a laser toward roads, railways or aircraft is a criminal offence, regardless of power.
- Keep it out of reach of children when it is running, and do not leave a lit unit where it can be picked up and pointed.
- Do not open the housing. The interlocks and the fixed optics are what keep exposure inside the rated limits, and a unit with the case off is a different device.
- If the projected pattern changes character — the dots become one bright spot, or a beam becomes visible in the air — stop using it. That indicates a damaged diffuser, and the whole output may now be concentrated.
Pure LED star projectors avoid this entirely, at the cost of softer, less star-like points. For a child's room, where the unit will be handled, that is the better trade.
Running it in a bedroom
- Blue and green are the alerting part of the spectrum. If the projector will run while someone is falling asleep, a warm red or amber nebula is a gentler choice than the blue and green combinations these units default to. It also looks better against white stars.
- Motion and brightness both matter more than colour. Static and dim beats moving and warm. Set brightness low enough that you cannot read by it.
When the field looks wrong
| What you see | Likely cause | What to do |
|---|---|---|
| Sharp stars, no clouds | Spill light, a dark or textured ceiling, or too long a throw | Black the room out and put the unit on a shelf. If the nebula appears, the problem was conditions, not hardware |
| One half of the field much brighter | The unit is tilted; the near side of an oblique throw is always brighter | Square it up to check. Even when square means nothing is wrong |
| Small, intense disc that does not read as sky | Unit too close to the ceiling | Move it to the floor or a low table |
| Dots merge into one bright spot, or a beam shows in the air | Damaged diffuser; the output may be concentrated | Stop using the unit |
Mounting the unit on the ceiling pointing down is mechanically possible on many models and looks poor: the field lands on the floor and furniture rather than on one unbroken surface, and the depth illusion depends on that surface. The same rule of contrast applies to any projected effect — see water ripple lights for the ambient-light limit in detail.
Setting it up tonight
Floor, a third of the way into the room, tilted across the ceiling. Room blacked out. Rotation on the slowest step or static, brightness low, timer at 30–60 minutes. Our star lights run on Lotus Lantern, and on most models the timer and speed live in the app rather than on the unit: which app controls your light has the mapping, and first-time pairing the steps if the lamp does not appear.
Questions about a specific star light of ours? Contact us.